All the code is available here: https://github.com/albertromkes/StripeIntegration
For a personal project, build with Blazor WebAssembly I needed an integration with a payment provider. Since stripe seems to be a perfect choice and integrates with everything, I decided to give it a go. I never actually build an integration with such a service, but I was pretty sure someone on the big internet already did. After a couple of searches I seriously began to doubt my google-fu. I couldn’t find any decent article / how-to on how to integrate Blazor WebAssembly with stripe. This was one of the first times the internet let me down. So, instead of using only 2 keys of my keyboard, I now had to use most of them to get this going.
The integration consists roughly of 3 parts:

The main components are:
- Client
- Written in Blazor WebAssembly
- Server
- Written in .NET Core
- Using the stripe nuget package
- Stripe
- The Stripe payment-backend.
Client
In order to make a payment your client (browser) needs to communicate with your own backend and with the Stripe servers. (See the image above for an overview of the flows involved)
Create a new Blazor WebAssembly project hosted in .NET Core:
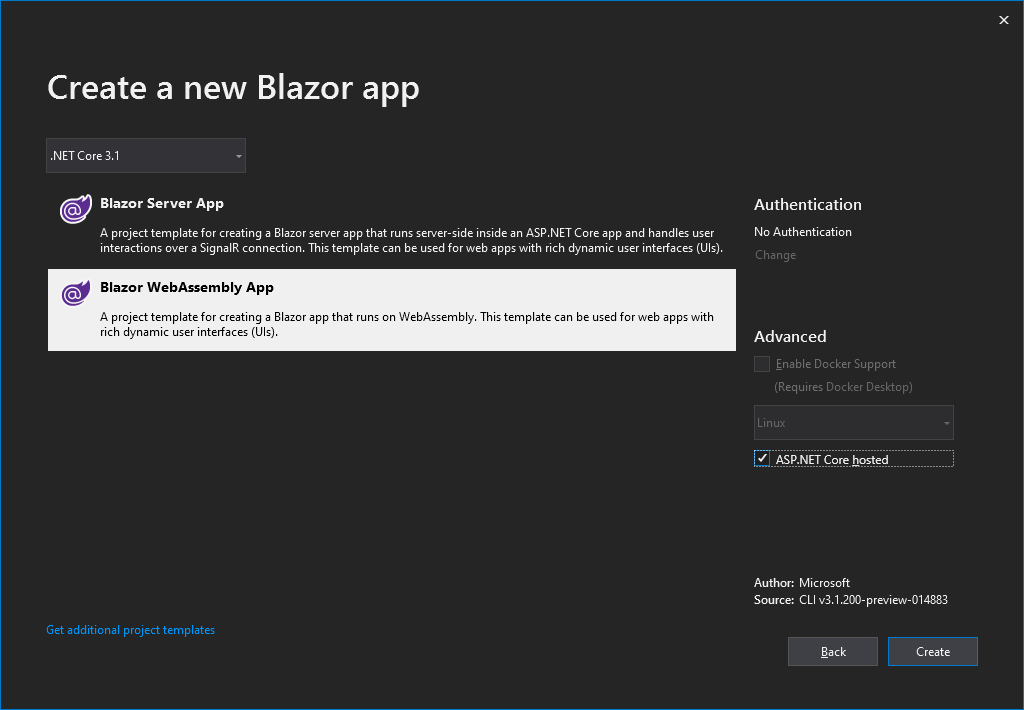
Don’t forget to check the ‘ASP.NET Core hosted’ option.
I’m totally not focusing on design in this post. I don’t want to trigger someones OCD. Next thing we need to do is install some dependencies. I’m gonna use blazor-fluxor to make it easy to handle async requests. So let’s install it with:
Install-Package Blazor.Fluxor -Version 1.4.0Next, add some boilerplate to get Fluxor going:
- In the Client project open the file
App.razor - At the top of the file add
@inject Blazor.Fluxor.IStore Store - Then add
@Store.Initialize()– This will initialize the store and inject any required Javascript - Edit the
/wwwroot/index.htmlfile. - Above the
<script>reference toblazor.webassembly.jsfile add the following script reference.
<script src="_content/Blazor.Fluxor/index.js"></script>
Next, add the DI part of Fluxor to Program.cs:
- In the Client project find the
Startup.csfile. - Add
using Blazor.Fluxor; - Change the
ConfigureServicesmethod to add Fluxor
public void ConfigureServices(IServiceCollection services)
{
	builder.Services.AddFluxor(options => options.UseDependencyInjection(typeof(Program).Assembly));
});
(Taken from: https://github.com/mrpmorris/blazor-fluxor/tree/master/samples/01-CounterSample)
Now we’re ready to get going with Fluxor. Let’s add a Store folder in the Client project and create some classes. Fluxor needs quite some boilerplate code. I’m not sure how I feel about that, but for now let’s put our doubts aside and get this integration integrating…
We need the following classes (see the GitHub repo for their implementations)
- PaymentState
- Responsible for holding the state of the payment
- PaymentFeature
- Fluxor concept. This uses the state and sets the initial state
- InitiatePaymentAction
- Description of the action that’s being fired
- InitiatePaymentActionReducer
- Respond to the
InitiatePaymentActionand update the state accordingly
- Respond to the
Next up we need a button to initiate the payment. Create a new page called StartPayment.cshtml in the Pages folder. (I’m using the Out Of The Box template from Visual Studio). This page is responsible for starting the payment. The implementation looks like this:
@page "/startpayment"
@inherits Blazor.Fluxor.Components.FluxorComponent
@inject IJSRuntime JSRuntime
@using Blazor.Fluxor
@using StripeIntegration.Client.Store
@inject IDispatcher Dispatcher
@inject IState<PaymentState> PaymentState

<h3>StartPayment</h3>

@if (PaymentState.Value.IsLoading)
{
    <p>Loading...</p>
}

@if (PaymentState.Value.ErrorMessage != null)
{
    <p>Errors: @PaymentState.Value.ErrorMessage</p>
}

@if (PaymentState.Value.Token != null)
{
    <p>Token: @PaymentState.Value.Token</p>


}

<button @onclick="StartPaymentClick">Start payment!</button>

@code {
    private async Task StartPaymentClick()
    {
        Dispatcher.Dispatch(new InitiatePaymentAction());
    }

    protected override async Task OnAfterRenderAsync(bool firstRender)
    {
        if (!firstRender)
        {
            if (PaymentState.Value.Token != null)
            {
                await JSRuntime.InvokeAsync<string>("stripeCheckout", null, 1, PaymentState.Value.Token);
            }
        }
    }
}
Let’s explain this page:
The @page, @inherits, @using and @inject are nothing new. Note the Fluxor specific usings and injectings (…)
Next, we’re checking the state values. Nothing too fancy. If the user clicks the Start payment! button, Fluxor kicks in and fires the InitiatePaymentAction. Blazor automagically updates the states and re-renders itself. The result is that the Loading... text appears as we’re starting the payment.
On a side note: don’t forget to update the usings in _Imports.razor. You should add your newly created classes:
@using StripeIntegration.Client
@using StripeIntegration.Client.Shared
@using StripeIntegration.Client.Store
Server
Now, let’s switch to the server. The client is more or less done, although there is one thing that we have to fix, but let’s do that after we’ve shizzled the serverside.
When the user clicks on the button to start the payment (think: shopping-cart) a request is fired to our own .NET Core server. Let’s make that a call to /api/startpayment. This endpoint is responsible for starting the paymentflow by creating a payment-session with Stripe. So, let’s create this controller and name it StartPaymentController:
namespace StripeIntegration.Server.Controllers
{
    [ApiController]
    [Route("[controller]")]
    public class StartPaymentController : ControllerBase
    {
        [HttpGet]
        public async Task<IActionResult> Get()
        {
            StripeConfiguration.ApiKey = "YourSecretStripeApiKey"; //Get it from your stripe dashboard

            var options = new SessionCreateOptions
            {
                PaymentMethodTypes = new List<string>
                {
                    "card",
                    "ideal"
                },
                LineItems = new List<SessionLineItemOptions>
                {
                    new SessionLineItemOptions
                    {
                        Name = $"Pants with 3 legs",
                        Description = $"Pants for those who have 3 legs",
                        Amount = 100, // 1 euro
                        Currency = "eur",
                        Quantity = 1
                    }
                },
                SuccessUrl = "https://localhost:5001/success?session_id={CHECKOUT_SESSION_ID}",
                CancelUrl = "https://localhost:5001/failed"
            };

            var service = new SessionService();
            Session session = await service.CreateAsync(options);
            return Ok(session.Id);
        }
    }
}
This controller will start the paymentsession with Stripe and returns a session-id to the frontend. That’s the Token from the PaymentState class in the /startpayment page!
It’s returned to this page and from there on we use this token to open the stripe checkout page. So, let’s switch back to the client because we need 1 more thing overthere.
Client (again)
Communicating with stripe requires some JavaScript magic. Since we are using Blazor on the client, we need to interop with this JavaScript.
Stripe needs 3 pieces of JavaScript:
- The stripe.js file. *Only* load it from stripe.js!
- A stripe object with a publishable key (get it from your stripe dashboard)
- A method that uses our Token from the server to start the stripe checkout session.
So, first things first and add the stripe.js JavaScript file in the wwwroot/index.html page. Put it in the <head>section:
https://js.stripe.com/v3/Next, also in the <head> section we need to create a stripe object using the publishable key from stripe:
<script>
        var stripe = window.Stripe('pk_test_publishablekeyfromstripe');

        window.stripeCheckout = function (callBackInstance, amount, token) {
            stripe.redirectToCheckout({
                sessionId: token
            }).then(function (result) {
               // up to you
            })
        };
</script>
As you can see this stripeCheckout method needs a token as input to start the checkout session. Let’s get this sorted! Well, actually we’ve already fixed this. Checkout the /startpayment page. There’s is a method called protected override async Task OnAfterRenderAsync(bool firstRender)This method calls the stripeCheckout method once the token is handed to it (via the Blazor update-mechanism). This call to stripeCheckout happens via the JSRuntime helper method to interop with the normal’ JavaScript from stripe.
But before this all works we need some more boilerplate on the client. Add the following classes to the Store folder and checkout their implementation in the GitHub repo:
- StartPaymentEffect
- Responsible for calling your own endpoint via a HttpClient
- StartPaymentSuccessAction
- Action to dispatch when the call to our server succeeds
- StartPaymentSuccessActionReducer
- Responsible for setting the state correctly when the call to our server succeeds. So, this class sets the token in the
PaymentState
- Responsible for setting the state correctly when the call to our server succeeds. So, this class sets the token in the
- StartPaymentFailedAction
- Action to dispatch when the call to our server fails
Also, don’t forget to add a success- and a failed page to your application. Whenever a customer cancels the checkout, stripe will redirect your customer to the failed-url. You configure it in your API on your own server. Same is true for the success page: whenever the checkout succeeds, stripe will redirect your customer to your success page.
And that’s it! You’ve got yourself a working integration with stripe checkout and Blazor WebAssembly.
Please checkout the GitHub repo and try it yourself. Don’t forget to replace all the tokens!
Used tools and versions
- Visual Studio Professional 2019 Preview – Version 16.5.0 Preview 2.0
- Blazor template: dotnet new -i Microsoft.AspNetCore.Blazor.Templates::3.2.0-preview1.20073.1
- .NET Core 3.1.200-preview-014883
- Blazor.Fluxor – v1.4.0
- Stripe.net – v34.20.0

Hi, Why I need to make the payment to appear in my Stripe dashboard? I did the code myself and also downloaded the github project but when I run the page, and click the pay botton it only says “loading” and nothing happens, I only replaced the public and private key of stripe for mine, is something more I have to do with the tokens? I have to replace the tokens with something? I noticed that in no method of this project there is something like a card number, There is still more process to make this work?
Sorry, I tried to say: What* I need to make my payment to appear on my Stripe dashboar…* in the last comment
It’s important to activate the phone number, it was my mistake
I cloned your project. I added my Stripe keys. When I click start payment the token returned is the entire html contents of wwwroot/index.html file. So I get an invalid token. Any ideas?